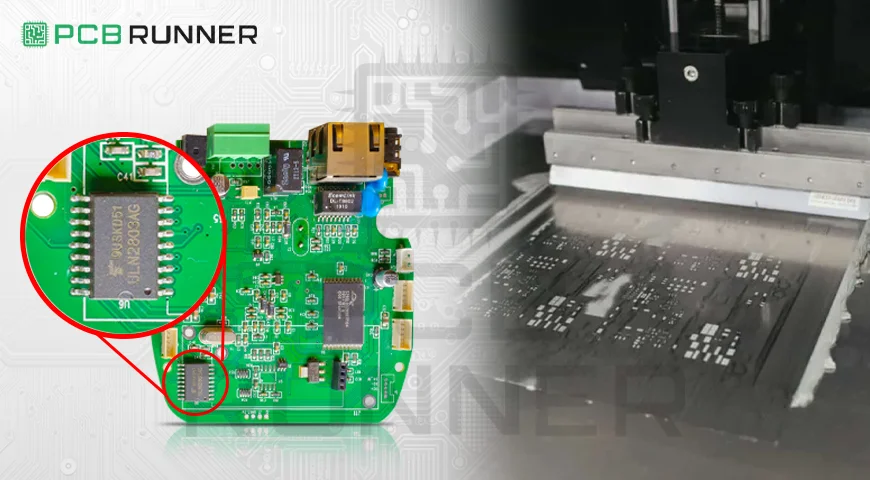
If you want clean solder joints and fewer errors in your circuit board assembly process, you need to pay attention to your stencils. Laser-cut stencils can make a big difference when it comes to surface mount technology (SMT) work. Whether you’re a PCB assembler or running a full-service PCB fabrication shop, the stencil you use matters more than you might think.
This blog will discuss how premium laser-cut stencils help boost SMT efficiency, reduce waste, and improve the final quality of your assemblies. We’ll also explain how they work, why thickness matters, and how they affect surface mount device soldering.
What Is a Laser Cut Stencil?
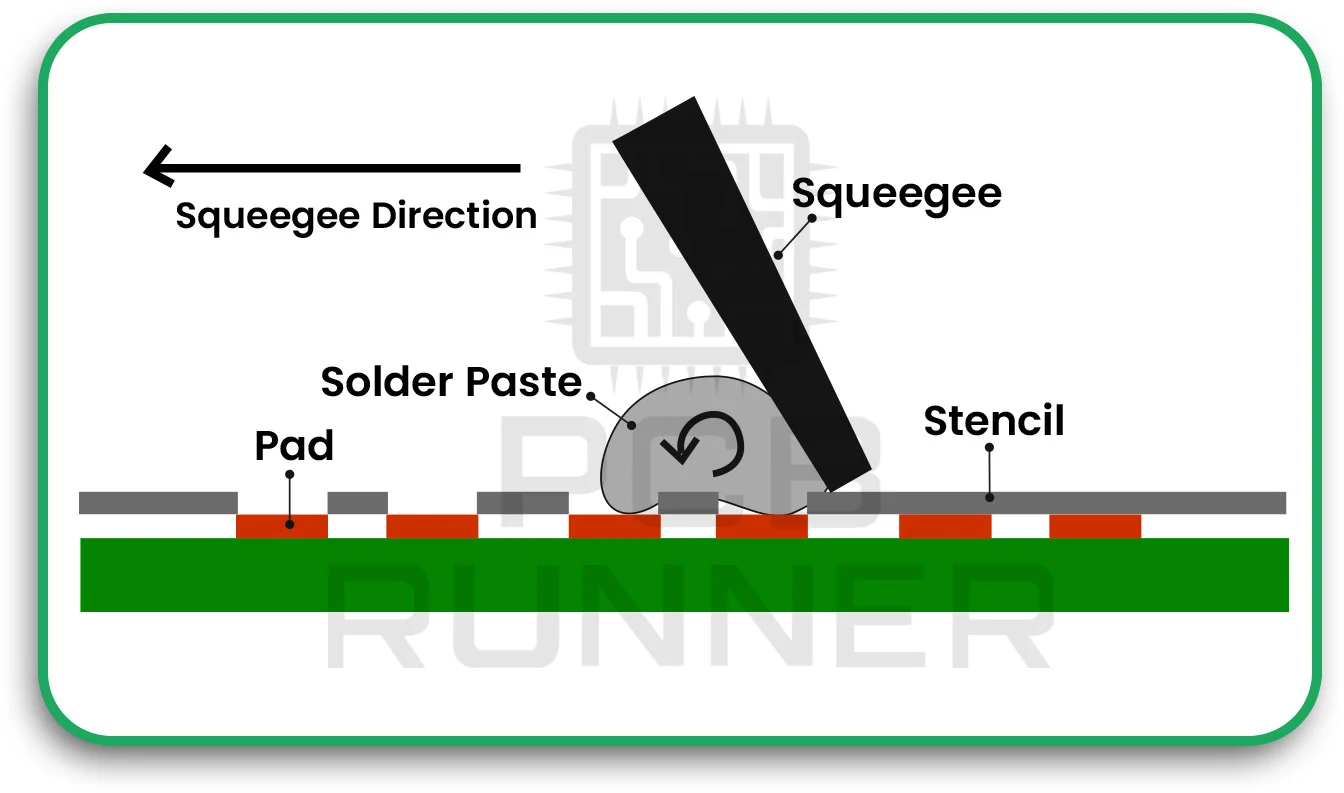
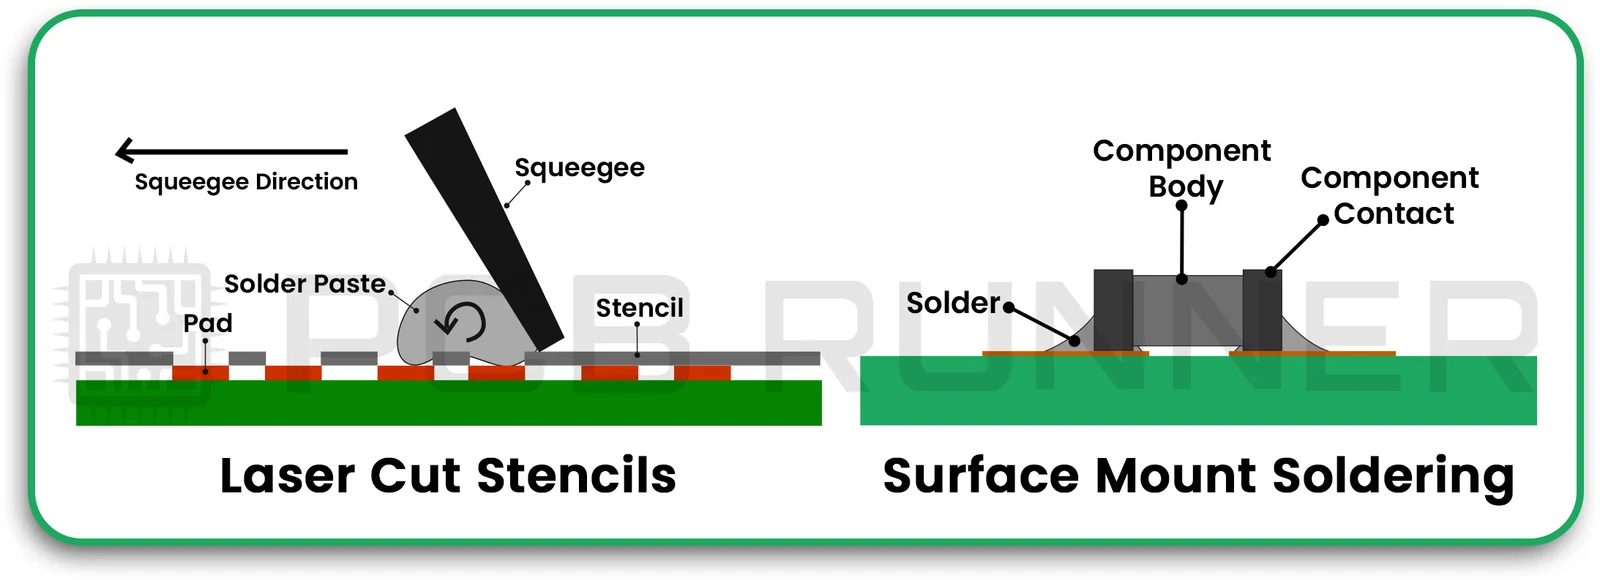
A laser-cut stencil is a thin sheet of metal, usually stainless steel, with openings that match your printed circuit board’s solder pad layout. It’s used during the SMT process to apply solder paste accurately onto the pads. Once the solder paste is applied through the stencil, your surface mount components are placed on top before the board goes through the reflow oven.
Laser cut stencils are created using precise lasers that ensure every opening is sharp and clean. Unlike older stencils made using chemical etching, laser-cut stencils give you better control over the paste volume and alignment. This makes them the first choice for most modern PCB assemblers.
Why Are Laser Cut Stencils Better?
If you’re wondering why these stencils are considered premium, here’s why:
- Better Accuracy: Laser machines cut immaculate edges, which means your paste is applied precisely where it’s needed.
- Consistent Paste Volume: Uniform openings ensure the same amount of solder paste is applied to every pad.
- Fewer Bridges and Voids: Better paste control reduces soldering issues like bridging and voids.
- Repeatability: You get the same great results every time, which helps reduce errors in mass production.
All these benefits lead to fewer touch-ups and rework later on.
PCB Stencil Thickness: Why It Matters
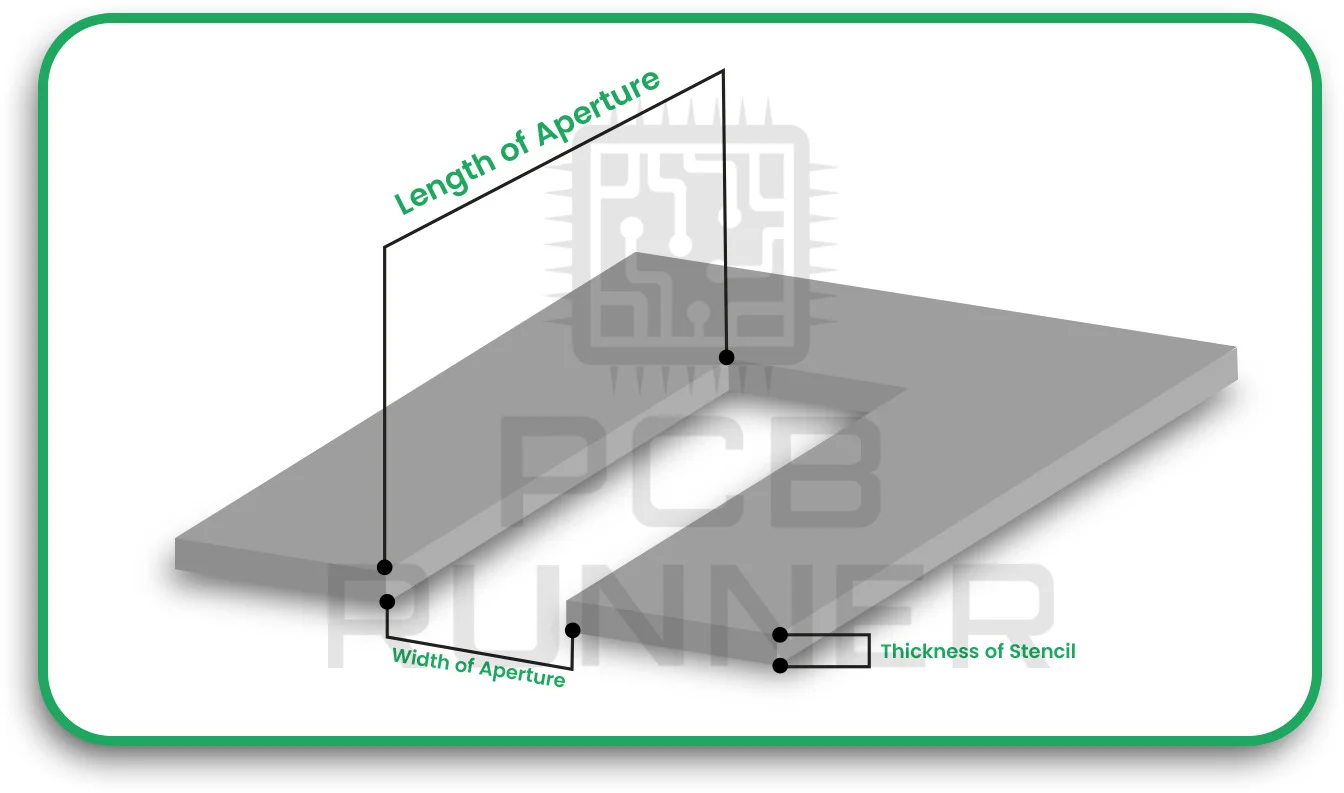
The thickness of your stencil has a significant impact on how well the solder paste is deposited. Too thick, and you might end up with too much paste, causing short circuits or bridging. Too thin, and you may not get enough solder paste, leading to weak joints or poor connections.
Most standard SMT stencils are around 0.1 mm to 0.15 mm thick. The proper thickness depends on the size and type of surface mount devices you’re using. For fine-pitch components or small pads, a thinner stencil is often the better choice.
Talk to your PCB assembler or circuit board assembly team about what stencil thickness works best for your project. Picking the proper thickness will reduce paste-related issues and improve yield.
Laser Cut Stencils and Surface Mount Device Soldering
Soldering small components like resistors, capacitors, and ICs is all about precision. Surface mount device soldering needs just the right amount of paste in the right place. Laser cut stencils help make this possible by giving you tighter control over paste placement.
When your paste is applied cleanly, components stay in place better during reflow. It also ensures strong joints once the solder melts and hardens. That’s how you get reliable connections that stand up to heat, vibration, and other stresses.
Why PCB Assemblers Rely on Premium Stencils
If you’re working with a professional PCB assembler, you’ll likely hear them mention the importance of a good stencil. That’s because:
- Stencils save time on manual paste application
- They cut down on waste and scrap boards
- They support consistent results across production runs
For high-mix, low-volume jobs or full-scale production, investing in a quality stencil just makes sense. You spend less time fixing problems and more time shipping working boards.
Key Tips for Choosing the Right Stencil
Selecting the correct stencil for your surface mount technology (SMT) process is crucial for consistent solder paste deposition and overall PCB assembly quality. A poorly chosen or maintained stencil can result in misalignment, insufficient or excessive solder, and costly rework. Below are the key tips to help you make the best stencil choice for your production needs.
1. Match the Stencil Thickness to Your Component Sizes
Stencil thickness directly affects the amount of solder paste deposited during the printing process. Thicker stencils (e.g., 0.15–0.20 mm) are suitable for larger components like connectors or power devices, while thinner stencils (e.g., 0.10–0.12 mm) are ideal for fine-pitch components such as QFNs or micro BGAs. If the thickness is not matched correctly, it can lead to solder bridging or insufficient solder joints. Always consider the smallest aperture and component pitch when determining the appropriate thickness.
2. Use Laser-Cut Stencils for Finer Accuracy
Laser-cut stainless steel stencils offer the highest precision and consistency, especially for complex and high-density SMT boards. They produce cleaner aperture walls, which helps in achieving uniform paste release. For critical applications with 0.5 mm or smaller pitch components, laser cutting is the preferred method. Electro-polished laser-cut stencils can further enhance paste transfer efficiency and reduce defects like solder beading or bridging.
3. Avoid Worn or Dirty Stencils to Prevent Smearing or Clogging
Stencil wear over time can lead to distorted apertures, clogged openings, or uneven paste application. Dirt, dried paste, or even moisture can also cause smearing, resulting in shorts and open circuits on the board. Regular inspection and cleaning of stencils are essential to maintain print quality. Automated stencil cleaners or manual cleaning with appropriate solvents can extend stencil life and ensure consistent results.
4. Store Stencils Flat and Clean to Maintain Shape
Improper stencil storage , such as bending, stacking, or exposure to dust , can warp the metal, damage apertures, or cause misalignment during printing. Stencils should always be stored flat in protective sleeves or frames in a clean, climate-controlled environment. Following proper handling and storage protocols helps maintain stencil integrity and prolongs its usability over multiple production cycles.
Work with a Trusted PCB Fabrication Partner Who Understands SMT Needs
Your stencil quality is only as good as the partner you work with. Collaborating with an experienced PCB fabrication and assembly provider ensures that your stencils are manufactured to exact specifications. A reliable partner will help you choose the right aperture design, thickness, and finish based on your specific component layout and soldering process. They can also advise on stencil design modifications, such as step-down regions or nano-coatings, for challenging applications.
From PCB Fabrication to Assembly: How Stencils Fit In
Your PCB fabrication process lays the groundwork. Once you get your board made, the next step is assembly. That’s where stencils come in. Whether you’re working with rigid, flex, or hybrid boards, having a proper stencil helps your assembly run smoother.
Some pc board manufacturers also offer stencil services alongside fabrication. If you’re placing an order with a PCB circuit board manufacturer, ask if they can supply a matching laser-cut stencil. That way, you can avoid delays and get a stencil that perfectly fits your layout.
Final Thoughts: Why It’s Worth It
Good stencils are not just extra tools. They are a must-have for efficient, accurate SMT. Using premium laser cut stencils helps you:
- Reduce soldering errors
- Improve product quality
- Lower assembly costs
If you want to get the most out of your circuit board assembly process, it’s worth choosing the right tools from the start. Laser cut stencils are one of those tools that give you better results without extra effort.
Talk to your PCB assembler or supplier about including laser stencils in your next order. A small step like this can go a long way in boosting your productivity.

